Show off Your Art: Easy Ways to Highlight Artwork With the Right Lighting
Ever seen an artwork that just doesn’t pop? Whether it’s a painting, photo, or sculpture, the right lighting can make it stunning. But how do we get that gallery-worthy glow at home? Let’s dive into the essential techniques and practical solutions to make our art collections shine like the pros.

Key Points
- Position track lights 30 degrees from vertical and 20-30 inches from the wall to minimize glare and create optimal illumination.
- Use LED lights with 2700K-3000K for warm-toned artwork or 4000K for cool-toned pieces to enhance natural colors.
- Select appropriate beam spreads: narrow for small details, medium for standard pieces, and wide floods for larger artworks.
- Maintain light intensity between 5-10 footcandles to protect artwork while ensuring proper visibility.
- Space light fixtures every 2-3 feet on the track and vary brightness to create visual hierarchy among displayed pieces.
Understanding Basic Art Lighting Principles
Lighting art right means knowing the basics. We focus on light intensity, beam spread, and color temperature. These elements help us see the art well and keep it safe.
Light intensity is key. Too much can harm the art, too little hides its beauty. Aim for 5-10 footcandles for most pieces.
Beam spread is important too. Position lights at a 30-degree angle to avoid glare and shadows. This gives an even light on the art.
Color temperature matters for true colors. Use 2700K-3000K for warm tones and 4000K for cool tones. Always use UV filters or LED lights made for art to protect it. Different art types need special lighting to show their best.
Track Lighting for Versatile Display
Track lighting is great because it lets us adjust the light beam. This means we can change how the light hits each piece.
Having multiple track heads means we can easily reconfigure lighting when we switch or rotate art.
Custom lighting solutions offer top-notch illumination. They help preserve the art while making it easy to view.
Adjustable Beam Spread Options
Track lighting is perfect for showing off art because of its adjustable beam spread. We can choose from narrow, medium, or wide beam spreads for the best light on each piece. Narrow beams highlight small details, while wide spreads light up big canvases evenly.
Let’s look at how different beam angles work. Narrow spots (5-15 degrees) are great for small details or focal points. Medium floods (25-35 degrees) are good for medium-sized art, reducing spill light. Wide floods (40-60 degrees) light up big art or gallery walls evenly.
To save energy and keep displays perfect, we choose LED track heads with adjustable beams. Many modern options have built-in adjustments, so we can tweak the beam without changing the fixture. This way, we avoid wasting light and ensure our art gets the right amount of light for viewing.
LED lighting solutions also prevent color fading and improve visibility for showcasing your collection.
Quick Configuration Changes
Modern track lighting systems have an easy slide-and-lock mechanism. This lets us make swift adjustments to our display needs. We can change the lights along the track without tools, perfect for rearranging our art or hosting events.
Today’s track systems have quick-release heads that we can move or replace in seconds. Most fixtures have tool-free locking mechanisms, allowing us to adjust the lights easily. LED heads let us change the light’s intensity and color without complex controls.
When setting up our lighting, consider systems with wireless capability. These let us create and save lighting scenes with smartphone apps or wall controls. This technology helps us change the mood and save energy with automated scheduling and motion-sensitive lights.
Skilled designers use track lighting to enhance color and value, making artwork look its best.
Spotlight Multiple Art Pieces
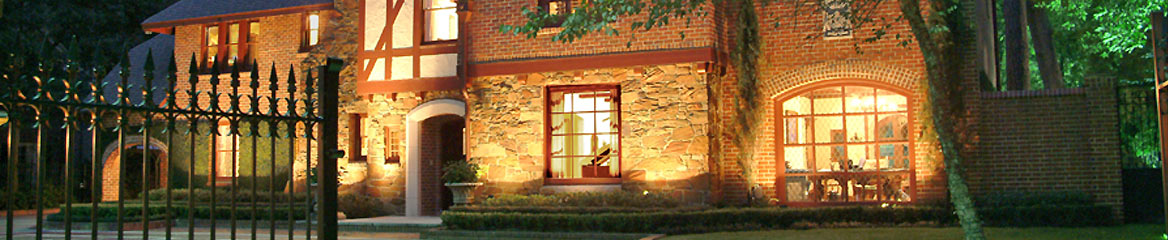
We can light up several art pieces with one track lighting system by placing lights strategically. Mounting lights 20-30 inches from the wall and at a 30-degree angle helps avoid glare. This setup maximizes visibility for each piece.
For energy efficiency, use LED track heads that use less power but provide focused light. Space lights based on ceiling height and artwork size. Adjust beam spreads for each piece: narrow for small works, wide for large ones.
To create a visual hierarchy, vary light intensity. Brighter lights for focal pieces, softer for supporting ones. Adjust positions seasonally to keep viewing conditions perfect all year.
The subtle lighting effects make the artwork emerge from darkness, enhancing its three-dimensional qualities.
Picture Lights and Their Applications
Picture lights provide focused illumination for artwork with the right mounting and placement. We aim for mounting heights and angles that minimize glare and ensure even light.
Picture lighting comes in traditional brass and modern LED options, each with benefits for preserving and enhancing the artwork.
Low voltage halogen accent lights in recessed fixtures are great for heat dissipation and protecting artwork.
Mounting Picture Lights Correctly
Picture lights add special light to artwork when installed right. They mix useful light with beauty. We must think about a few key points to keep our artwork safe and light it up well.
The height and angle of the light matter a lot. We should place the light 2-3 inches above the frame’s top. Angle it at about 30 degrees to avoid glare and heat damage.
| Mounting Factor | Requirements | Benefits |
|---|---|---|
| Height | 2-3″ above frame | Reduces shadows |
| Angle | 30° downward | Minimizes glare |
| Distance | 6-8″ from wall | Even coverage |
| Power Source | Hidden wiring | Clean aesthetic |
When we install picture lights, we need to connect them right and use the right hardware for our walls. For battery or plug-in lights, we should hide the wiring. Use materials that won’t harm our walls or artwork. This way, we’ll make a lighting setup that makes our art look great and keeps it safe for a long time.
Types of Picture Lighting
Different lights highlight unique qualities in art, from old-fashioned lights to modern LED ones. We’ll look at lights that protect our valued pieces and show off their beauty. Conservation-grade options keep our art looking good for many years.
We have many special lights for different art types and needs:
- Traditional Adjustable Arm Lights – Classic brass or bronze that extend, giving precise light and warm glow for oil paintings
- Contemporary Track Lighting – Flexible systems for highlighting many pieces, great for gallery walls or changing collections
- LED Picture Lights – Save energy, have low UV, and can change color, safe for delicate art and true colors
- Recessed Ceiling Spots – Professional lighting for dramatic shadows and depth, best for sculptural or textured art
Choosing the right lights, we’ll find the perfect balance of light and protection for our art.
Natural Light Strategies
Placing art near windows and skylights uses natural light well. We should put art where it gets indirect light, not direct sunlight that can harm it. North-facing windows give the most even, soft light all day, perfect for our favorite pieces.
We can use adjustable window treatments like cellular shades or curtains to control daylight. Watching how light changes in our spaces helps us place art for protection and visibility all year.
Using UV-protective glass or films on windows helps keep art safe from harmful rays while letting natural light in.
In rooms with many windows, we should balance art placement to avoid shadows. Near skylights, place art on walls next to it to avoid glare but still enjoy the room’s light.
LED Options for Artwork
Modern LED lighting is energy-efficient and versatile for showing off artwork. We can pick from different colors and beam widths to highlight our pieces. This helps protect them from UV rays. LED lights and track systems give us precise control over the light, creating the perfect ambiance for our art.
When picking LED lights for our artwork, we should look at a few key things:
- Color Rendering Index (CRI) – Pick LEDs with a CRI of 90+ for accurate color representation of our artwork’s true hues and subtle gradients
- Adjustable Color Temperature – Choose fixtures that offer 2700K-3000K for warm lighting that complements traditional pieces, or 4000K for contemporary works requiring crisp illumination
- Beam Angle Control – Install adjustable fixtures that allow 15-60 degree spreads to accommodate different artwork sizes and viewing distances
- Dimming Capabilities – Incorporate dimmable LEDs to balance artificial light with natural daylight and adjust for ambient conditions
These modern lighting solutions protect our investments by producing little heat and blocking UV rays. They also cut down on energy use while ensuring ideal viewing conditions for years to come.
Common Lighting Mistakes to Avoid
While LED technology has many benefits, wrong lighting can harm our artwork’s visual impact and even damage it. Let’s steer clear of these common mistakes to safeguard our treasured pieces and display them well.
First, never place lights that cause direct glare on artwork, like pieces under glass. Instead, angle our lights at 30 degrees to reduce reflection. We should also avoid placing artwork in direct sunlight or using uncovered halogen bulbs, as UV rays and excessive heat can fade or warp our pieces over time.
Another mistake is getting the light intensity wrong. Too bright, and we’ll lose the artwork’s fine details; too dim, and its impact will be lost. We’ll keep the right distance between the light and artwork – usually 1.5 to 2 times the artwork’s height. We should also avoid creating unwanted shadows by using inadequate light spread or improper placement.
Lastly, let’s not overlook color temperature. Using bulbs with the wrong color rendering index (CRI) can change our artwork’s true colors. We’ll choose LEDs with a CRI of 90 or higher to keep color accuracy and authenticity.
Color Temperature and Artwork
Understanding color temperature is key to properly lighting artwork, as it affects how we see colors and details. When choosing lighting, we’ll consider both the artwork’s dominant colors and the ambient lighting in our space. This helps create harmony and prevents distortion of the artist’s intended vision.
The trick is to match color temperature to your artwork’s characteristics. For warmer pieces with reds, oranges, and earth tones, use lighting between 2700K-3000K. Cooler artworks with blues and greens look best under 4000K-5000K lighting. For galleries with multiple pieces, 3500K is a great neutral choice.
Let’s make the best lighting choices with these guidelines:
- For oil paintings and traditional works, use warm white light (2700K-3000K) to enhance rich tones
- For photographs and contemporary pieces, choose neutral white (3500K) to maintain color accuracy
- For black and white artwork, opt for cool white (4000K) to maximize contrast
- For mixed media installations, install adjustable LED systems that allow temperature flexibility
Accent Lighting Techniques
Accent lighting turns artwork into eye-catching focal points. We’ll look at ways to make this happen without harming our artwork.
Track lighting is very flexible. It lets us adjust the light beam between 30 and 45 degrees. This is perfect for highlighting our artwork’s texture and depth. For bigger pieces, we use more than one light to avoid shadows and ensure even light.
Recessed adjustable fixtures are sleek and simple. We place them in the ceiling, 18-24 inches from the wall. This setup is great for delicate pieces, as it uses LEDs that don’t harm the artwork with UV rays or heat.
Picture lights above the artwork are classic. But, we must install them carefully to avoid damaging the frame. For modern looks, wall washers create soft, even light that enhances both the art and its setting.
Frequently Asked Questions
How Much Should I Budget for Professional Art Lighting Installation?
Plan to spend $1,500-5,000 on professional art lighting. This covers good fixtures, installation, and the right light for our art.
Can Humidity From Spotlights Damage Oil Paintings Over Time?
Spotlights that get hot and humid can harm oil paintings. We should use LED lights with UV filters and keep them far away to protect our art.
Do Motion-Sensor Lights Work Well for Displaying Artwork in Hallways?
Motion-sensor lights aren’t good for art. They can cause sudden light changes and uneven lighting. Instead, use dimmable LEDs with manual controls.
What’s the Ideal Distance Between Multiple Artworks for Balanced Lighting?
Keep artworks 24-36 inches apart. This lets each piece have its own light zone, creating a balanced view.
Should I Adjust Lighting Seasonally When Artwork Is Near Windows?
Yes, adjust lighting near windows with the seasons. Dim lights in bright months and brighten them in darker months to protect our art.
Takeaway
We’ve covered how to light art right, protecting and showcasing it. Whether using adjustable track lighting or choosing the right Kelvin temperatures, good lighting changes how we see art. By using these precise lighting techniques and avoiding mistakes, we display art well and keep it safe.
Follow Us: